
A couple months ago my son asked me for a desk for his room. Sounds easy enough. Not really. It needed to be a certain size, so that it didn't seem overbearing for his small room. Shopping online got a little overwhelming none of them seemed to fit the bill without being over $300. My son grew inpatient. One Saturday I found a desk that was the right size, but it was pink and white. Then I noticed the desk was wood and pressed cardboard. The desk was $15, I debated and debated wondering can I make this into something. The only reason I went for it was the price and it really was the right dimensions. Here is before.......


and after....

I started by stripping it. I decided to strip it because of the layering of paint it had on it. I tried the spray on stripper. I didn't like it and will not use it again. Here's why. Of course, when you are stripping any furniture you want to do it outside because of ventilation and you don't want stripper on anything else. With spray on stripper when the wind blows so does the spray on stripper. Right onto me, it burns. So I went back to what I know how to use, the paint on stripper.
When you paint it on, you let it sit for a couple minutes and you'll see the paint start to bubble.
Then take your scrapper and scrap off the old paint.


When I applied the stripper to the top of the desk I realized it was plastic. Bummer, how am I going to work with this. I didn't have a clue. I decided I had to finish this project and think while I worked.

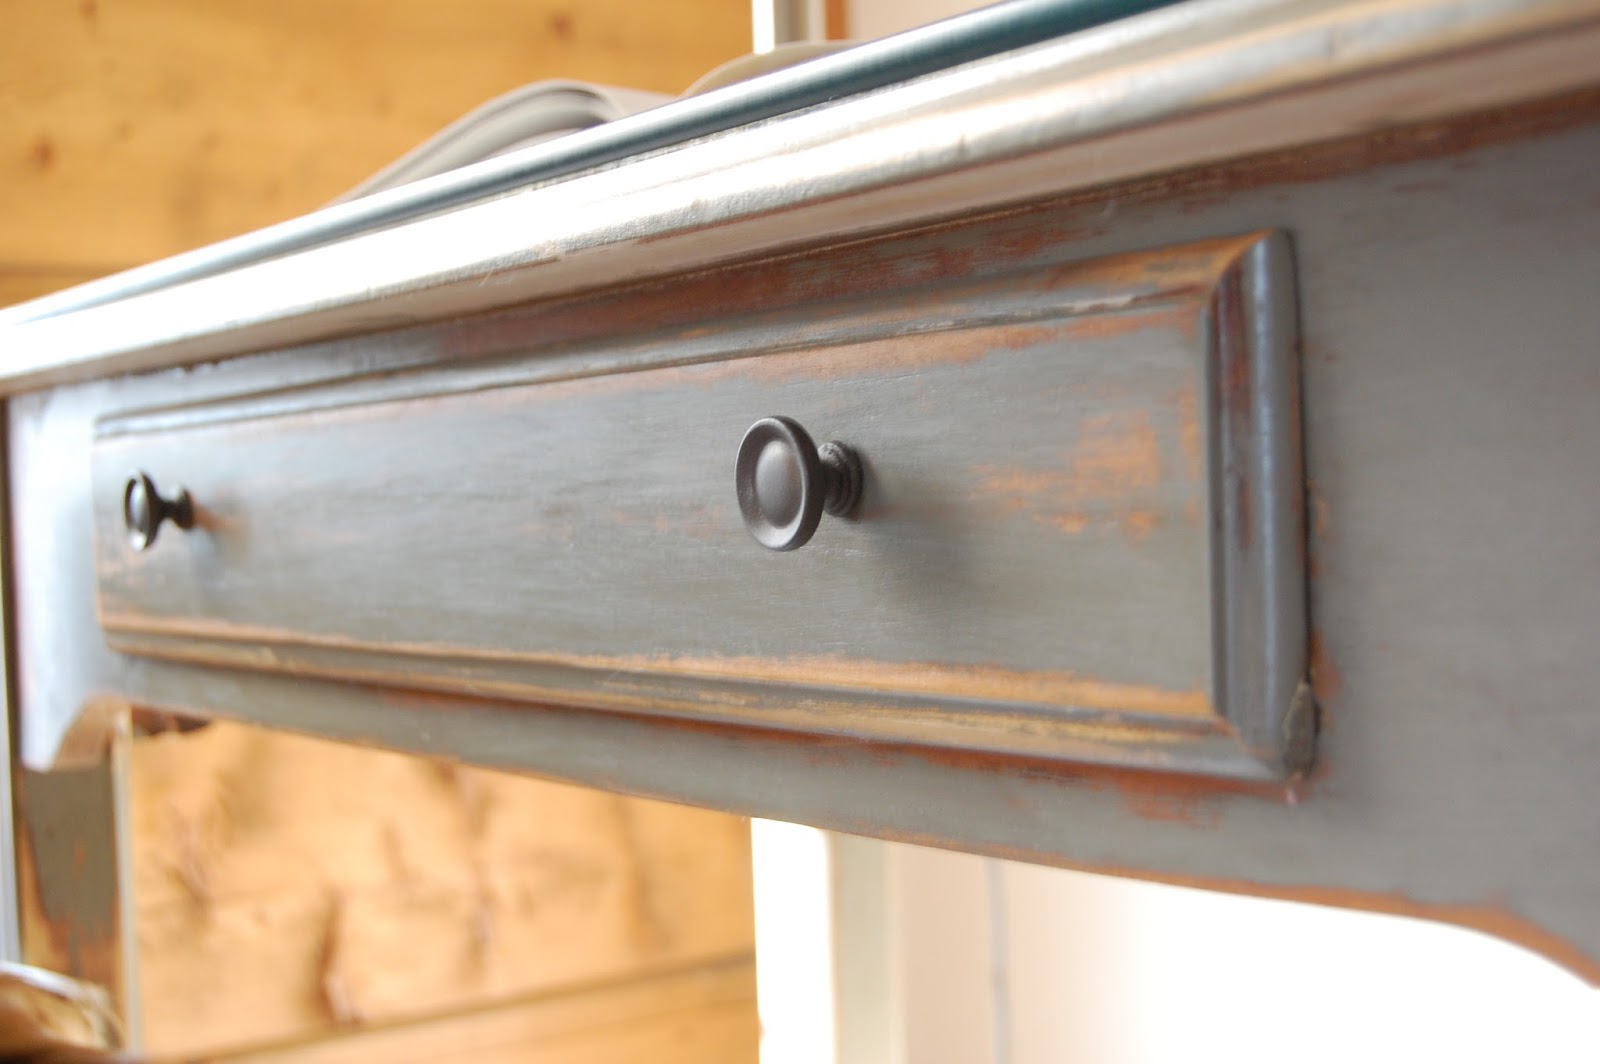
I loved the wood on the legs and kept debated on wether to paint or stain but with a plastic top I decided I would need to paint. Then there is the decision of what color. Decisions, decisions, decisions.


I went with a green. I usually go get paint chips and bring them home and see how it looks in our lighting. I painted it and rested overnight. Then the next day is always my favorite. Distressing.
I really try not to distress all my pieces but I just love the distress look. :)


Now that I stripped it, painted it and distressed it. It's time to clear coat it.
I like to use water base clear coat "satin".
I did 2 coats on this desk. With lightly hand sanding between coats.
I like to use the sponge brushes, that way you don't see my strokes.
Sometimes you can get bubbles with the sponge brush. I just try to get excess off the brush
and lightly go over the bubbly area.


To spray paint knobs I have found it easy just to pop them through a
styrofoam cup. That way they stay in place.

Below are the products I used for this project.


Now for the top.
While I was thinking about what to do I played with the idea of doing a Mod Podge (A.K.A. decoupage). My son is a bee keeper. A friend of mine suggested that I do that on top under the glass top. Great idea. My hubby printed off various bee information and pictures. Then I layered them on top of a cardboard piece. I decided to Mod Podge a piece of cardboard to lay under the class, so that it could be removed in the future.

I layered it and burned some of the edges. I didn't want it to have a neat clean look to it.

I like to apply the Mod Podge to the surface and then lay the print down on the layer of Mod Podge.
Then I go over the print as to seal it.
There is no right or wrong way. You just figure it out as you go.
I had this out on our kitchen table trying to figure out which picture should go where.
Decisions I tell you. I stew over them.
The family would walk by and play with it like it was a puzzle.


So here it is in all its glory.
Get ready for picture overload.


In the end I was happy with my purchase and so was my son.
No comments:
Post a Comment